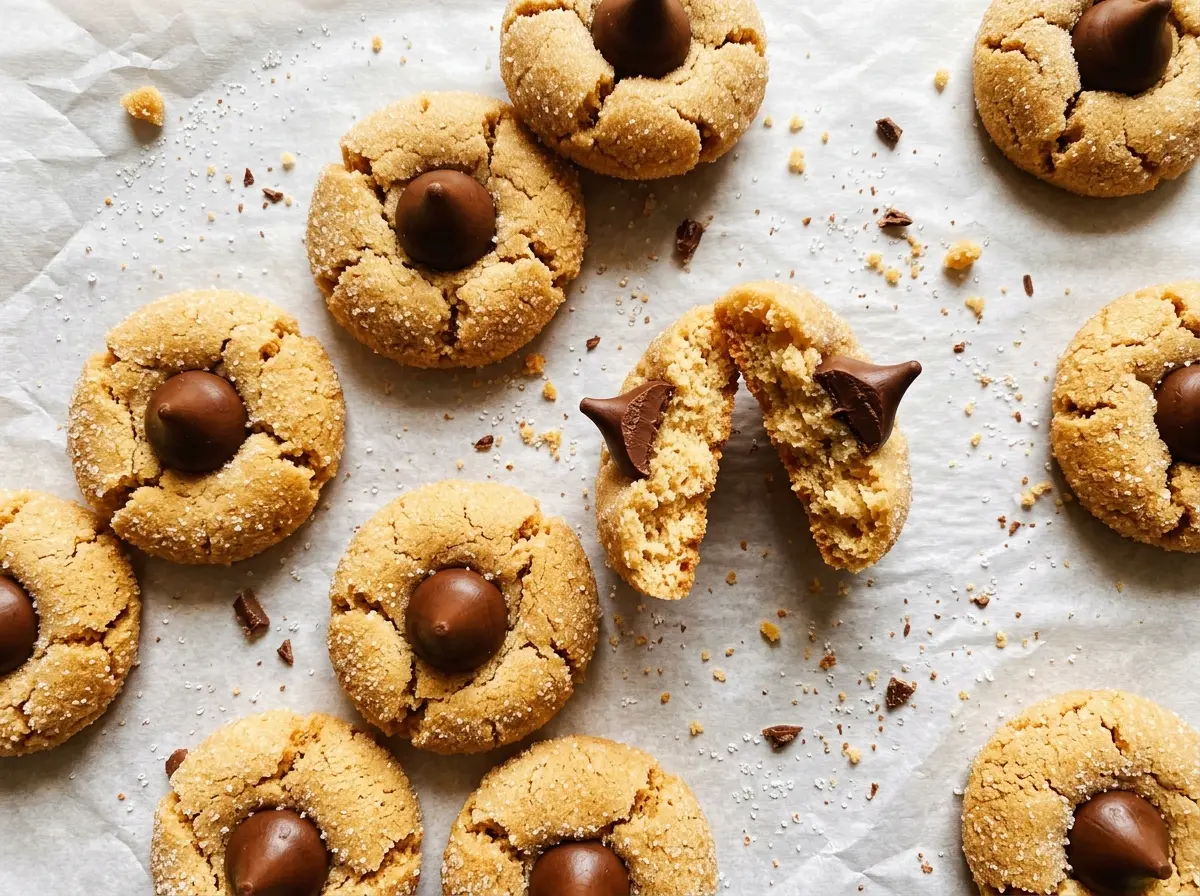
The moment these cookies come out of the oven, they’re puffed and tender, with edges that have just set. Pressing a chocolate kiss into each center gives them their familiar look, but it’s also the point where a little care helps: the cookies are still delicate, and the kiss needs a steady, straight press. Peanut Butter Blossoms are a classic for a reason—the peanut butter cookie stays soft around the chocolate, and the sugar coating gives the outside a delicate crunch.
I mix the dough until the flour disappears, then give it time to firm up in the refrigerator before rolling. That pause makes the dough easier to handle and helps the balls keep their shape on the baking sheet. A coating of granulated sugar adds a fine sparkle and a lightly crisp shell without making the centers heavy. Each batch makes 36 cookies, so you’ll have plenty of blossoms to cool on the rack and tuck away for later.
Kitchen Note
Press the kiss straight down into the warm cookie rather than rocking it from side to side. The cookies are tender just out of the oven, and a straight press helps keep the centers neat.
Save these Peanut Butter Blossoms for a bake with soft peanut butter centers, a sparkling sugar coating, and a chocolate kiss in every cookie.
Why Chilling the Dough Keeps the Blossoms Easy to Shape
Peanut butter dough can feel soft and tacky after mixing, especially when the butter is softened. Trying to roll it right away makes the job messier, and the dough balls are harder to shape evenly. A 30-minute chill firms the butter and gives the flour time to hydrate, so a tablespoon portion rolls into a smooth ball instead of sticking all over your hands.
Look for dough that feels firm enough to handle, not hard or crumbly. If your refrigerator runs cold and the dough feels stiff, let it sit briefly until you can scoop and roll it without forcing it. Uniform balls matter here: they bake at a similar pace, so you’re less likely to pull a small cookie when a larger one still needs time. This short rest also makes the sugar coating easier to apply evenly.
The dough doesn’t need to be chilled overnight to work. The goal is a workable texture, not a long rest for its own sake. Once you can form smooth balls without the dough clinging heavily to your fingers, it’s ready for the sugar and baking sheets.
What the Peanut Butter and Two Sugars Do in This Dough

- Creamy peanut butter — It brings the signature roasted peanut flavor and contributes fat to the cookie’s tender texture. A conventional creamy style gives the dough an even consistency; natural peanut butter with separated oil can make the dough’s texture less predictable.
- Unsalted butter — Softened butter creams smoothly with the sugars and helps the cookies spread. It should give slightly when pressed but still feel cool; melted butter changes the dough texture and makes it harder to cream properly.
- Granulated and light brown sugar — Granulated sugar sweetens the dough and forms the outside coating. Brown sugar adds moisture and a mild molasses note, helping the cookies stay soft in the center. Packed brown sugar measures consistently; break up any firm lumps before mixing.
- Egg and milk — The egg binds the dough, while the milk helps bring it together without making it overly stiff. Use a large egg, as specified, and let it lose its refrigerator chill before mixing if you have time; cold ingredients can make softened butter firm up.
- All-purpose flour and baking soda — Flour gives the cookies structure, and baking soda helps them puff as they bake. Whisk them with the table salt before they go into the wet mixture so the leavener is distributed instead of concentrated in a few bites.
- Milk chocolate kisses — Their shape makes the classic center, and their sweetness balances the peanut butter cookie. Unwrap them before baking so you can press one into each warm cookie as soon as the pan comes out.
From Creamed Peanut Butter Dough to Chocolate-Centered Cookies
Whisk the Dry Ingredients and Cream the Fats
Heat the oven to 375°F and line two baking sheets with parchment paper. Whisk the flour, baking soda, and table salt together in a medium bowl. In a large bowl, beat the softened butter, creamy peanut butter, part of the granulated sugar, and the brown sugar for about 2 minutes, until creamy. If the mixture still looks streaky, scrape the bowl and continue beating until the butter and peanut butter are evenly blended.
Mix the Dough Without Overworking It
Beat in the egg, milk, and vanilla until the mixture looks combined. Add the flour mixture and mix only until no dry streaks remain; a few seconds longer than necessary can make the cookies tougher. Scrape down the sides and bottom of the bowl so no pockets of flour are left behind. Cover the dough before chilling it.
Chill, Portion, and Coat
Refrigerate the covered dough for 30 minutes, until it’s firm enough to roll. Put the remaining granulated sugar in a small bowl, then shape the dough into 1-tablespoon balls and roll each one in the sugar. Check that the coating reaches the sides as well as the top; bare patches won’t have the same lightly crisp finish. Arrange 12 balls about 2 inches apart on a prepared baking sheet.
Bake Until the Edges Set, Then Add the Kisses
Bake one sheet at a time for 8 to 10 minutes, until the cookies are puffed and the edges are set. Don’t wait for deep browning; the cookies should still look tender when you take them out. Immediately press one unwrapped chocolate kiss into the center of each cookie. Let them rest on the baking sheet for 5 minutes, then transfer them to a wire rack to cool.
Two Ways to Change the Peanut Butter Blossoms
A little more peanut crunch
Swap the creamy peanut butter for crunchy peanut butter in the same amount. The dough will have small peanut pieces throughout, and the finished cookies will feel less smooth, but they still roll and hold a chocolate center.
A less-sweet chocolate center
Use semisweet chocolate kisses in place of the milk chocolate ones. They fit the same center-press method and give each cookie a deeper, less sweet chocolate bite against the peanut butter.
Storage and Reheating
- Room temperature: Keep the cooled cookies in an airtight container for up to 4 days. The sugar coating softens a little as they sit, while the centers stay tender.
- Freezer: Freeze fully cooled cookies in an airtight freezer container for up to 2 months, separating layers with parchment. Thaw them at room temperature in the closed container.
- Reheating: These cookies are best at room temperature, so they don’t need reheating. Avoid microwaving them; the chocolate kiss softens much faster than the cookie.
Answers to Peanut Butter Blossom Questions
Peanut Butter Blossoms
Ingredients
Equipment
Method
- Heat the oven to 375°F.
- Line two baking sheets with parchment paper.
- Whisk the flour, baking soda, and salt together in a medium bowl.
- In a large bowl, beat the butter, peanut butter, 1/2 cup of the granulated sugar, and brown sugar until creamy, about 2 minutes.
- Beat in the egg, milk, and vanilla until combined.
- Mix in the flour mixture just until no dry streaks remain.
- Cover and refrigerate the dough for 30 minutes, until firm enough to roll.
- Put the remaining 1/4 cup granulated sugar in a small bowl.
- Shape the dough into 1-tablespoon balls and roll each in the sugar.
- Arrange 12 balls about 2 inches apart on a baking sheet.
- Bake one sheet at a time for 8 to 10 minutes, until the cookies are puffed and the edges are set.
- Immediately press one chocolate kiss into the center of each cookie.
- Let the cookies rest on the baking sheet for 5 minutes.
- Transfer the cookies to a wire rack to cool.