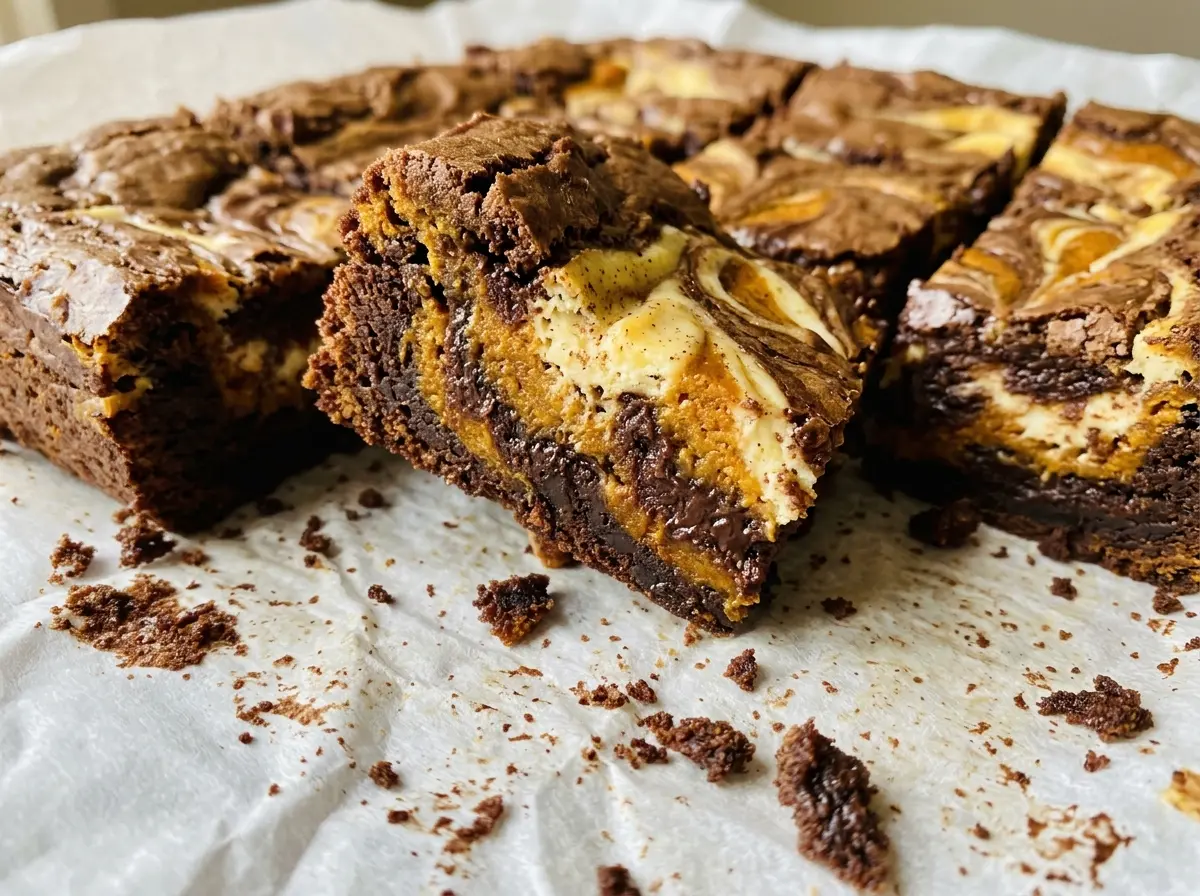
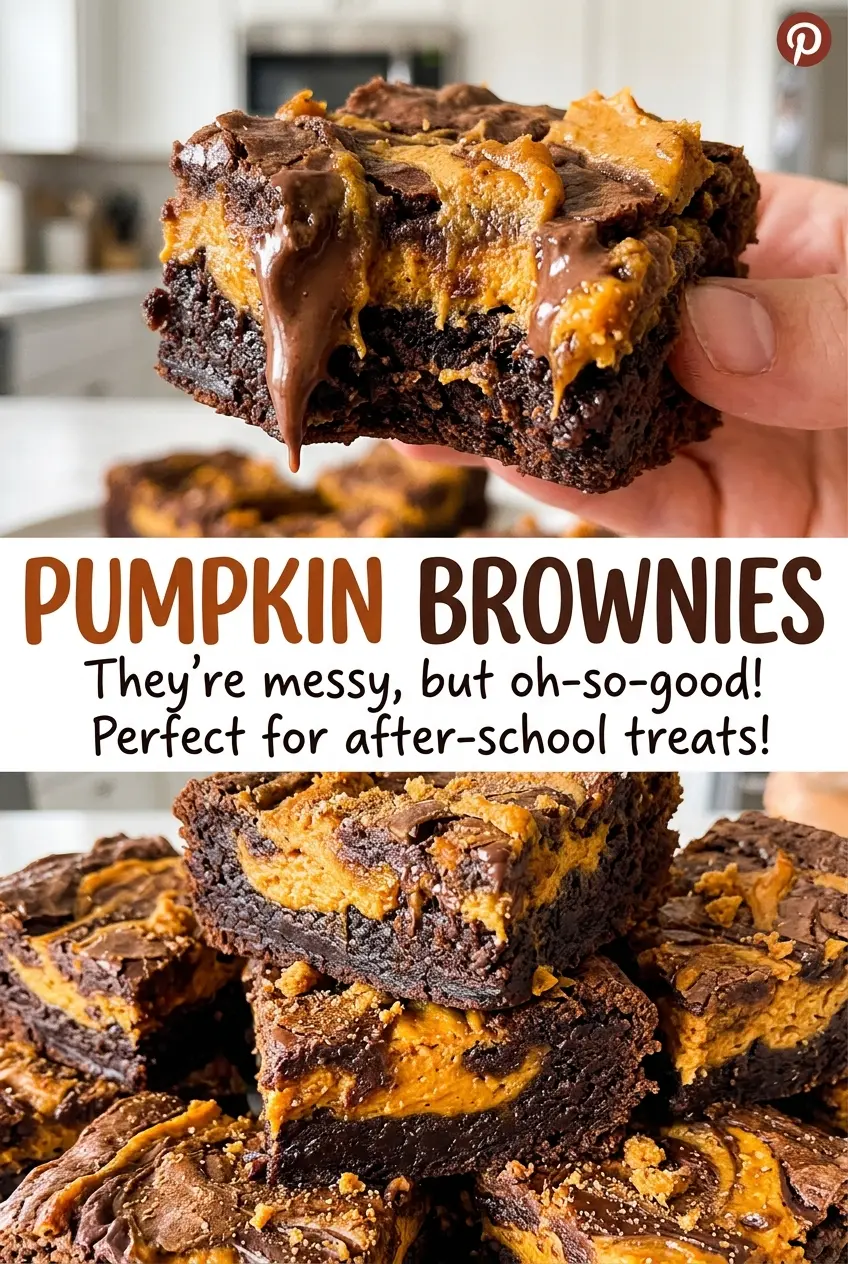
The first cut through these brownies shows you exactly where the chocolate ends and the pumpkin swirl begins. The brownie base is rich and dark, while the cream cheese and pumpkin make a softer ribbon through the top. I like that contrast: every square has both, without turning into a single orange-tinted batter.
While testing them, I found that the order of mixing matters more than any fancy technique. The butter needs a short rest after melting before the eggs go in; too-hot butter can scramble them instead of giving the batter its glossy look. The pumpkin mixture gets beaten separately, so it stays smooth and distinct from the cocoa batter.
These pumpkin brownies bake in an 8-inch square metal pan, then cool right in the pan before you lift them out and cut them. Give the layers time to set, and you’ll have neat squares with fudgy chocolate and a tender pumpkin-cream-cheese swirl.
Kitchen Note
Let the melted butter cool for the full 5 minutes before you add the eggs. If it’s still piping hot, the eggs can start to cook in the bowl instead of blending into a glossy brownie batter.
Save these pumpkin brownies for a chocolate square with a tender pumpkin-cream-cheese swirl and a fudgy center.
Why These Brownies Need Two Distinct Layers
The chocolate batter and pumpkin mixture aren’t meant to bake into the same texture. The brownie base is made with cocoa, butter, and flour, while the pumpkin layer includes cream cheese and an egg. Keeping those mixtures separate gives each one room to set in its own way: a dense, chocolatey bottom with a softer, spiced swirl on top.
That contrast is also why a few visible ribbons look better than a fully blended surface. If you work the knife back and forth until the top turns uniformly brown, the pumpkin and cocoa lose their definition. A gentle swirl leaves clear patches of both, so the pumpkin reads as a creamy accent rather than disappearing into the brownie.
There’s a practical bonus to the layered approach, too. You can judge the brownie portion on its own when checking for doneness, instead of expecting the pumpkin section to give the same toothpick result. The center of that swirl has a different consistency, so a moist crumb from the chocolate section is the useful cue.
What Gives the Chocolate Base and Pumpkin Swirl Their Character
- Unsweetened cocoa powder — This supplies the brownie’s chocolate flavor without adding sweetness. Use a cocoa you enjoy tasting on its own; the cocoa is the main source of that dark, rounded chocolate note.
- Unsalted butter and granulated sugar — Melted butter gives the brownie batter its rich base, and granulated sugar dissolves into it as you whisk. Unsalted butter lets the listed salt stay in control rather than making the finished squares too salty.
- Eggs — Two eggs bind and enrich the brownie batter, while the remaining egg helps the pumpkin mixture set. Use large eggs as listed so both layers have the intended balance.
- All-purpose flour — Flour gives the chocolate layer enough structure to hold the swirl without making it cake-like. A standard, unbleached all-purpose flour is fine here; there’s no need for specialty flour.
- Cream cheese — Softened cream cheese makes the pumpkin layer smooth and gives it a tangy, creamy quality that pumpkin alone won’t provide. Let it soften before mixing so cold lumps don’t linger in the swirl.
- Canned pumpkin puree — Choose plain pumpkin puree, not pumpkin pie filling, which is already sweetened and spiced. The puree brings the pumpkin flavor and moisture to the top layer.
- Light brown sugar and pumpkin pie spice — Brown sugar gives the pumpkin mixture a mellow molasses note, while pumpkin pie spice supplies its familiar warm seasoning. Packed light brown sugar keeps the sweetness gentle enough to balance the cocoa.
Build the Batter, Swirl, and Bake Without Losing the Layers
Prepare the Pan and Cool the Butter
Heat the oven to 350°F and line an 8-inch square metal baking pan with parchment, leaving an overhang on two sides. Melt the butter in a medium microwave-safe bowl, then let it cool for 5 minutes. That short rest matters before the eggs go in. The parchment overhang gives you a way to lift the cooled brownies out cleanly.
Mix a Glossy Brownie Batter
Whisk the granulated sugar into the melted butter until combined. Whisk in 2 eggs and the vanilla until the mixture looks glossy. Add the cocoa powder, flour, and salt, then fold just until no dry streaks remain; working it beyond that point can make the brownie layer tougher. Set aside 1/2 cup of batter, then spread the rest evenly in the pan.
Beat the Pumpkin Layer Until Smooth
In a medium bowl, beat the softened cream cheese with the packed light brown sugar until smooth. Beat in the pumpkin puree, the remaining egg, and the pumpkin pie spice until the mixture has an even color and no visible cream cheese lumps. If the cream cheese is still cold and firm, small lumps are harder to work out. A smooth mixture spreads over the brownie base without dragging it along.
Swirl, Bake, and Let the Squares Set
Spread the pumpkin mixture over the brownie batter, then dollop the reserved brownie batter on top. Gently swirl the layers with a knife, stopping while you can still see both colors. Bake for 38 to 45 minutes, until the edges are set and a toothpick inserted into a brownie section—not the pumpkin swirl—comes out with moist crumbs. Cool completely in the pan, about 2 hours, then lift the brownies out by the parchment and cut them into squares.
Three Small Changes That Still Let the Swirl Shine
Use a 1:1 gluten-free flour blend
Replace the all-purpose flour with the same amount of a cup-for-cup gluten-free baking blend designed to replace wheat flour. The brownie layer may be a little more tender, but the pumpkin swirl and chocolate flavor stay the same. Don’t use almond flour as a direct swap; it won’t give the base the same structure.
Make the swirl cinnamon-forward
Swap the pumpkin pie spice for the same amount of ground cinnamon. You’ll get a simpler, less layered spice note that lets the pumpkin and tangy cream cheese come through more clearly.
Give the pumpkin layer a deeper molasses note
Use packed dark brown sugar instead of light brown sugar in the pumpkin mixture. The swirl will taste a little more caramel-like, with a slightly deeper sweetness alongside the cocoa.
Storage and Reheating
- Refrigerator: Store the cooled brownies in an airtight container for up to 4 days. The chilled pumpkin swirl firms up and the brownie tastes denser.
- Freezer: Freeze cut squares individually wrapped, then place them in an airtight freezer container for up to 2 months. Thaw in the refrigerator.
- Reheating: For a slightly warm square, microwave one piece for 8 to 10 seconds. Longer heating can make the cream cheese swirl overly soft.
Questions That Come Up While Baking Pumpkin Brownies
Pumpkin Brownies
Ingredients
Equipment
Method
- Heat the oven to 350°F.
- Line an 8-inch square metal baking pan with parchment paper, leaving an overhang on two sides.
- Melt the butter in a medium microwave-safe bowl and let it cool for 5 minutes.
- Whisk the granulated sugar into the melted butter until combined.
- Whisk in 2 eggs and the vanilla until glossy.
- Add the cocoa powder, flour, and salt, and fold just until no dry streaks remain.
- Set aside 1/2 cup of the brownie batter.
- Spread the rest of the brownie batter evenly in the prepared pan.
- Beat the cream cheese and brown sugar in a medium bowl until smooth.
- Beat in the pumpkin puree, remaining egg, and pumpkin pie spice until smooth.
- Spread the pumpkin mixture over the brownie batter.
- Dollop the reserved brownie batter on top.
- Gently swirl with a knife.
- Bake for 38 to 45 minutes, until the edges are set and a toothpick inserted into a brownie section (not the pumpkin swirl) comes out with moist crumbs.
- Cool completely in the pan, about 2 hours.
- Lift out using the parchment and cut into squares.